

Do You Have Interest in Electrophoresis Tanks?
An electrophoresis tank is a core device used to hold electrophoresis buffer and samples in electrophoresis experiments. Its design and performance directly affect the accuracy and reproducibility

Key Takeaways
Most disappointing blots get blamed on antibodies or on transfer, yet the real problem often started an hour earlier, at a bench, with two pieces of glass. A gel casting system is the hardware that holds those plates a fixed distance apart while a liquid acrylamide mix sets into a solid slab. Once the slab exists, nothing later in the workflow can repair a gel that was poured unevenly or that thinned out at one corner.
The parts themselves are simple. Two plates, one short and one with bonded spacers, form a sandwich. A frame or base holds that sandwich upright and seals its lower edge. A comb moulds the wells along the top. Everything else, from the electrode assembly to the buffer tank, only matters after the gel has formed. That leaves four places where a pour can go wrong: the bottom edge, the gasket, the clamp, and the glass itself.
Leaks rarely come from a single dramatic mistake. One small gap opens, and capillary action does the rest. That gap is almost always at the bottom edge of the sandwich, and it is almost always one of the four following things.
A chip on the bottom edge, a speck of dried acrylamide, or a plate seated half a millimetre high all create the same narrow channel. Hold the assembled sandwich up to the light before you pour. Any bright line along the bottom edge means the seal is already compromised.
Sealing gaskets are elastomer parts, and elastomer parts take a permanent set. After months of compression, salt creep, and cleaning, a gasket stops returning to its original thickness. It still looks intact, which is precisely what makes this failure so hard to spot. Warm water can revive a mildly stiffened gasket for a while; a visibly flattened one needs replacing.
This is the cause that gets the least attention and explains the most mystery leaks. Traditional casting frames hold the plates with a spring-loaded cam or a rotary side fastener. A spring is defined by its rate and free length, and both drift as it cycles. Salt deposits stiffen the pivot, the cam stops travelling its full arc, and the force pressing the short plate against the gasket quietly drops.
The consequence is not a dramatic flood. You get a slow, intermittent seep that appears on some days and not others, usually on one side rather than the middle. Rotary fasteners add a second problem, because the force they apply depends on how far you happen to turn them by hand. Two operators, two different seals.
A press-lock base and a sliding wedge side fastener approach the same job differently. Instead of relying on stored spring energy, they lock the plate against the gasket at a fixed travel. The force you apply on the first day is the force you apply on the five-hundredth.
A single grain of set acrylamide under the plate is enough to hold it off the gasket by a fraction of a millimetre. Rinse the bottom edges with distilled water before every assembly, and retire any plate with a chipped corner. Glass is cheap; a ruined run of eight samples is not.
Assemble the sandwich dry, lock it, and pipette distilled water into the space between the plates. Wait two minutes and watch the level. A steady meniscus means the seal is sound, so any later leak must come from the pour itself. A falling level tells you the problem is mechanical, and you can fix it before acrylamide is involved.
Knowing where a seal fails is half the job. The other half is what you do in the minutes before you pour. One piece of background comes first, then four steps, each carrying one failure mode worth watching.
A vertical cassette carries two gels stacked one above the other. The upper one, a stacking gel of roughly 4–5% acrylamide at pH 6.8, squeezes proteins into a narrow starting line. The lower one, the resolving gel at pH 8.8 and anywhere from 6% to 15%, separates them by size. You pour the resolving gel first, let it set, then pour the stacking gel on top.
Because the boundary between the two is a liquid surface rather than a moulded edge, it is the most fragile feature in the whole cassette. A level boundary lets every lane start from the same height. Suppose it sits at a slight angle instead. Each lane then begins its run from a different height, bands arrive skewed, and two proteins that differ by a few kilodaltons stop being distinguishable.
A cassette that seeps during pouring ends up in much the same state, because the level falls while the gel sets. One of those faults stays hidden until you stain the gel; the other only shows up to someone watching the level during the pour.
Wipe both plates with isopropanol and a lint-free cloth, then let them dry completely. Water left on the glass makes the plates cling to each other and slide out of alignment as you close the clamp. Stand the short plate against the spacer plate, check that their bottom edges sit flush, and lock them down with even pressure. If those edges are not flush, no clamp will rescue the pour, and the leak will appear as a thin film spreading under the frame.
Mix the resolving gel, draw it into the sandwich to the mark you want, then overlay it immediately. Water works, and so does water-saturated isopropanol. Deliver the overlay slowly from a pipette along one edge and let it spread across the surface. Oxygen in the air inhibits polymerization, and the overlay both excludes it and flattens the meniscus. Skip this step and the top of your resolving gel will set with a curve in it, which no amount of care at the stacking step will straighten.
Tip off the overlay, blot the last drops with filter paper, and pour the stacking gel. Slide the comb in at a shallow angle so that trapped air escapes ahead of it, then straighten it and leave it undisturbed. A comb pushed in flat, or one that rocks while the gel sets, produces wells of uneven depth and a ragged floor. A ragged floor leaks sample sideways between lanes once the run starts.
Fresh ammonium persulfate matters more than any other reagent here. Prepare a 10% solution and use it the same day, with TEMED at roughly 0.05–0.1%. Expect 30 to 45 minutes at room temperature. A cold room slows the reaction considerably, and residual oxygen slows it further, so cast at bench temperature when you can.
You will know the gel has set when a sharp refractive line appears under the overlay and the remaining liquid no longer shifts when you tilt the frame. Lift the frame before that point and a half-set gel will slide, opening the very gap the clamp was holding shut.
Before any SDS-PAGE protein electrophoresis run, two settings shape almost everything about how the gel behaves, and both are decided before you pour.
| Resolving gel | Comfortable separation range | Typical target |
| 6% | 50–200 kDa | Large complexes, low-abundance high-mass proteins |
| 8% | 30–120 kDa | Mid-to-high mass targets |
| 10% | 20–80 kDa | General purpose, most routine blots |
| 12% | 10–50 kDa | Small-to-mid mass targets |
| 15% | below 20 kDa | Peptides and very small proteins |
A gradient gel covers a wider range in one run, although it is harder to pour by hand and costs more per cassette.
| Spacer thickness | Wells | Comfortable load per well | Notes |
| 0.75 mm | 10 or 15 | 5–15 µL (10 wells); 3–10 µL (15 wells) | Sharpest bands, lowest reagent use |
| 1.0 mm | 10 or 15 | 10–25 µL (10 wells); 5–15 µL (15 wells) | The everyday compromise |
| 1.5 mm | 10 or 15 | 15–40 µL (10 wells); 10–25 µL (15 wells) | Best for dilute lysates |
Those load figures sit well below the maximum each well will hold, which leaves room for the sample to settle without spilling into a neighbour. Thicker gels also run warmer, so plan a lower voltage or a cooler room if you move up a size.
Manual gel casters – two plates, a spacer, a comb, and a frame – cost a fraction of what cassettes do per gel, and they let you choose any acrylamide percentage you like. That flexibility matters when you are chasing a difficult target or working with an unusual buffer system.
A pre-cast gel removes the casting step altogether, which buys consistency and saves an hour of technician time. The trade-off is price per gel and a shelf life that limits how far ahead you can plan.
A casting setup only matters at the points where a leak starts. Two things decide whether a cell holds its seal over years of use: the geometry of the plates and the way they are clamped. A mini vertical electrophoresis cell that runs one or two gels suits a small group; a four-gel unit suits a shared bench or a teaching lab.
Mini formats cluster around 10 × 8 cm cassettes because that size balances resolution against run time. Check the actual gel footprint and plate dimensions rather than the nominal format, since a few millimetres of difference will decide whether your existing combs and spacers still fit.
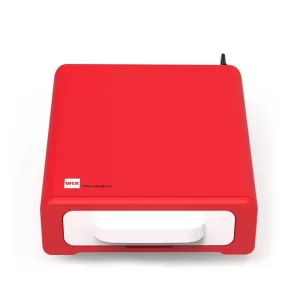
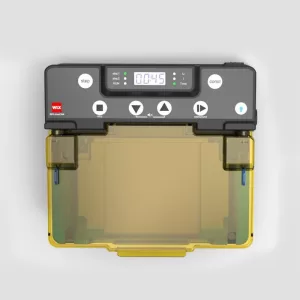
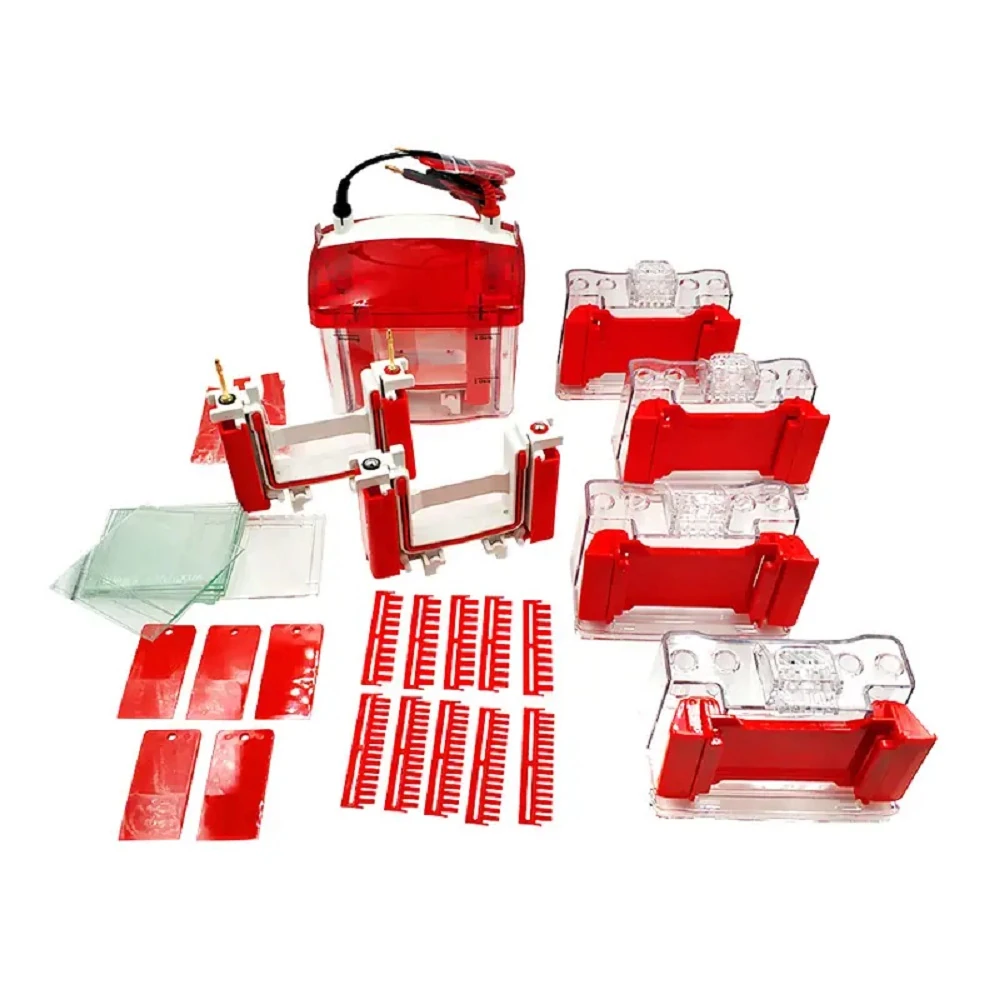
The WIX-easyPRO4 from WIX Technology is a four-gel unit built around the casting step. It holds one to four hand-cast or pre-cast mini gels, and all four can be run within a single hour. The gel footprint measures 83 × 73 mm inside a cassette built from a 100 × 73 mm short plate and a 100 × 83 mm spacer plate. Spacers come in 0.75 mm, 1.0 mm and 1.5 mm, and each thickness accepts 10-well or 15-well combs.
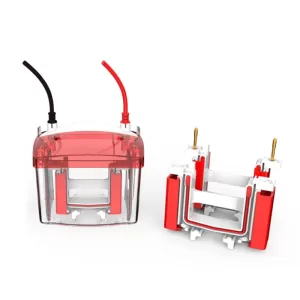
Four independent casting frames let a single person pour four gels at once instead of working through them one at a time. Each frame sits on a flat glass support, so the plates cannot slide or drop out while you are closing the clamp. That small detail saves a surprising number of broken plates. A cam mechanism aligns the plates as the frame closes, and the graded markings on the glass, together with the labelled combs, make the height of the resolving gel easy to judge by eye.
Where most frames compress the plates with a spring, this base locks them with a press-and-push action. Because the travel is fixed rather than elastic, the seal does not weaken as the mechanism ages, and every operator applies the same force. The reinforced polycarbonate base is built to survive that repeated loading.
The side fasteners use a sliding wedge that presses the short plate against the sealing gasket as you close them. A round bar lifts the short plate automatically at the same moment, so nobody has to push glass upward by hand while tightening a latch. The result is a seal that depends on the geometry of the fastener rather than on how firmly you happen to turn it.
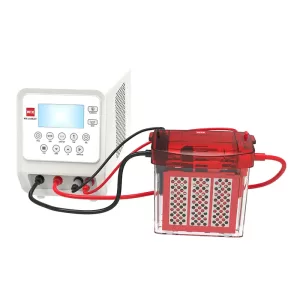
The electrode is 0.25 mm platinum wire, chosen for even current distribution and a long service life. The unit occupies 180 × 130 × 160 mm of bench space. It carries CE marking and is manufactured under ISO 9001. Because the cassette format is standard, labs can move between hand-cast gels and commercially supplied cassettes without changing hardware. Keep the electrode assembly easy to rinse, because salt crust on the wire is a common source of uneven migration.
Intermittent leaks point to a mechanism, not a technique. A spring clamp loses force with age and a gasket compresses unevenly, so the seal fails only under some conditions. Compare water tests from a good day and a bad one; a difference confirms the hardware is the variable.
The resolving gel set with a curved surface. Usually the overlay was missing, uneven, or poured too fast. Water or water-saturated isopropanol, delivered slowly along one edge, flattens it.
The comb moved while the gel was setting, or the gel was still soft. Insert it at an angle, leave it alone until fully set, then pull straight up in one motion.
Yes, if the cassette format matches. A cell built for 10 × 8 cm mini cassettes accepts standard pre-cast gels of that size. Check plate dimensions, not the marketing name.
Casting looks like the least technical part of a blot, and it is the part most often blamed for results that make no sense later. Academic groups, biopharma quality control teams, and clinical laboratories meet a failed pour differently, yet all three lose the same thing: a run that cannot be repeated. The recipe is largely settled science, and the variables that actually move are mechanical. Plates that sit flush, a gasket that still has its thickness, and a clamp that applies the same force every time will do more for band quality than any adjustment downstream.
If your lab runs SDS-PAGE every week and you are weighing up a casting cell, describing your throughput, plate format and typical gel thickness is usually enough to get a configuration recommendation back the same day.